£ GBP
 € EUR
 $ USD

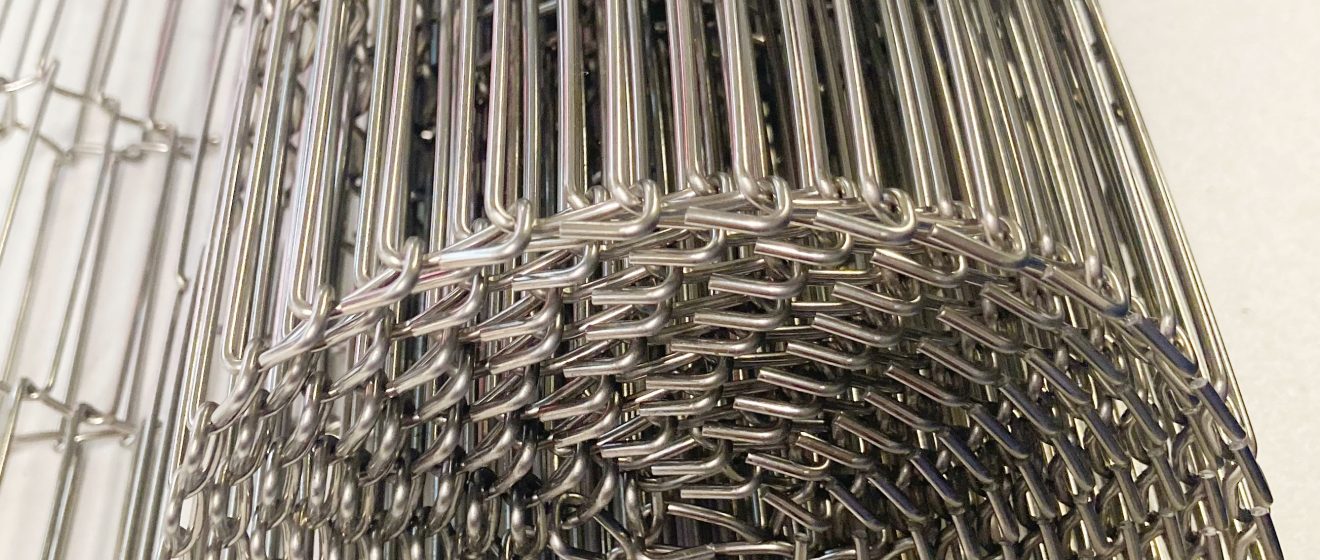
Here’s a practical, step-by-step guide to removing and installing a new oven conveyor belt.
Before starting, make sure you check the manufacturer’s instructions too.
Safety First
1.Power Off – Turn off and unplug the oven. If it’s gas-powered, also shut off the gas supply.
2.Cool Down – Allow the oven to cool completely before working.
3.Protect Yourself – Wear gloves and safety glasses.
4.Check Your Oven Manual – for specific instructions
Tools You Might Need
Before you begin, the following tools are needed during the installation:
- Needle nose pliers
- Wire cutters
- Screwdriver set (Phillips/flathead)
- Wrench set or socket set
- Flashlight (to see inside the housing)
Removing the Old Conveyor Belt
1.Remove Access Panels
- Locate and remove the side or bottom access panels on the conveyor housing.
- Keep screws/fasteners in a container so that they do not get lost.
2.Release Belt Tension
- Find the tension adjustment mechanism (usually on the idler pulley or roller).
- Loosen the adjustment bolts to release tension on the belt.
3.Disconnect the Belt
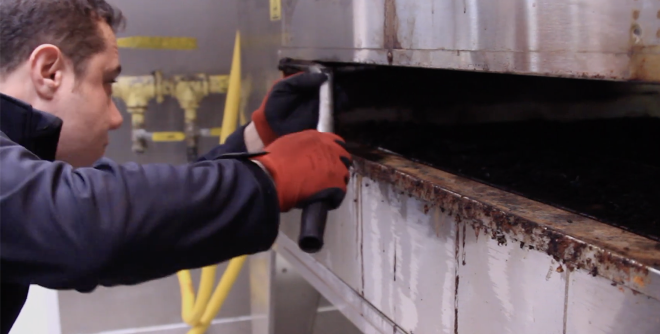
- Slide the belt off the drive sprockets, rollers, or pulleys.
- If the belt is linked or pinned, use pliers to disconnect the link.
See the instructional video on our Instagram and Facebook pages on how to disconnect the belt for more info.
Removing Conveyor Belt Links
1.Locate the Master Link or Clip
- Look for the connecting link (often secured with a spring clip, cotter pin, or “C-clip”).
- It usually looks slightly different from the other links.
2. Remove the Clip/Pin
- Use needle-nose pliers or a flat screwdriver to carefully slide or pry off the clip.
- Keep the clip and pin in a safe spot – you will need them later.
3.Separate the Link
- Push the pin out of the link.
- The belt will now separate, allowing you to remove it from the oven or shorten it if needed.
4.Remove the Belt from the Oven
- Carefully pull the belt out.
Installing the New Conveyor Belt
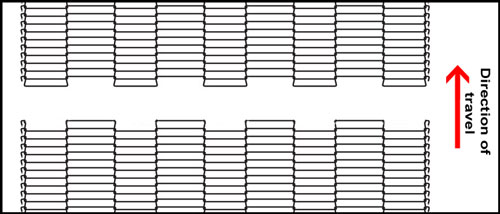
1. Position belt on your pizza oven as shown below. Note direction of travel.
2.Cut any excess
If your belt is too long, it might be necessary to cut any excess belting with wire cutters. Before doing this, hold the belt together as if it were connected and check the tension of the conveyor belt to decide how many wires need to be removed. The belt should lift between 3 to 4 inches when pulled upwards. If necessary, carefully cut the wire strand(s) to remove the full width. The wire strand weaves between two rows, so be sure you are only cutting out the intended wire.
3.Connect
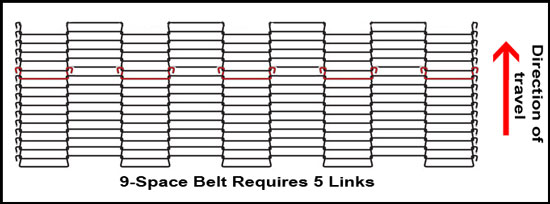
Once you have established a desired length, connect the provided inside master links/splice clips. When examining all splice clips, you will notice that 2 have a longer left and right side. You will use these for the edges after the centre splice clip is in place.
Check that the splice clips are oriented as shown below and bend them with your needle nose pliers.
4. Check Movement
After the splice clips/links are connected, check for freedom of movement of the conveyor belt by pulling it forward (as it will move in operation) for about 2-3 feet (60 to 90 cm) with your fingers. The conveyor must move freely.
5. Insert the belt into the oven housing, aligning it with the rollers and sprockets.
6. Reassemble Panels Replace and secure all access panels.
Final Checks
- Plug the oven back in (and reconnect gas if applicable).
- Run the oven empty for a few minutes to test belt movement.
- Watch for slipping, drifting, or unusual noises.
- Make final tension/tracking adjustments as needed.
Check out the wide range of conveyor belts on our website https://pizzaparts.co.uk/product-category/belts/
You can also chat to one of our experts on line or view instructional videos for removing XLT belts